Without further ado, let’s get straight to the essentials:
01Business households launch SOP
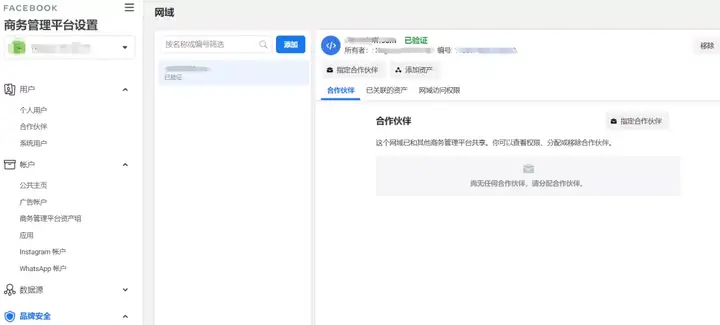
1. First verify the domain:
- Enter BM, click Business Management Platform Settings-Brand Security-Domain-Add.
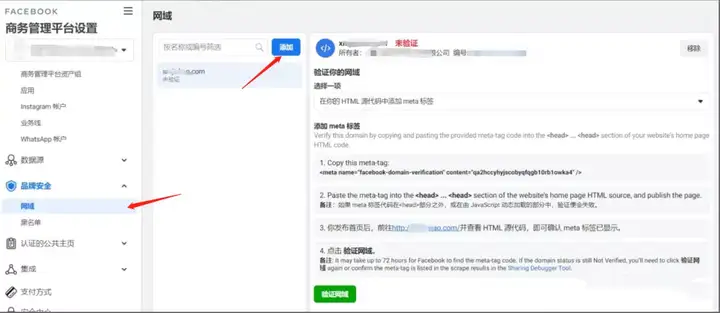
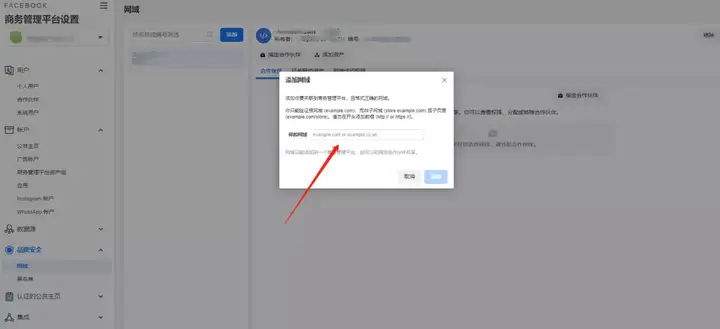
- After clicking Add, enter your domain name and click Add.
- Then we use DNS configuration, select the third one, and add the following piece of code to the DNS server (where you bought the domain name, ask the provider to help log in to the DNS for verification).
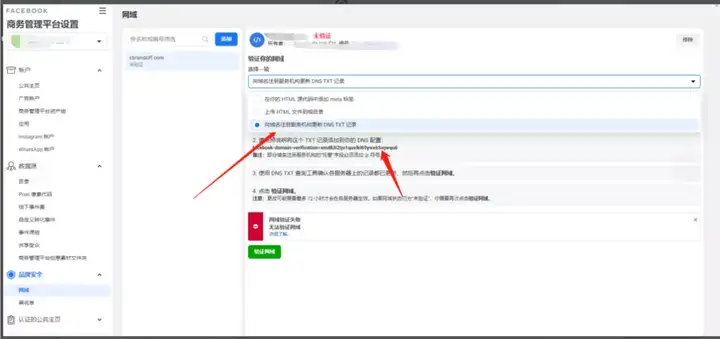
- After the above operations are completed, click "Verify domain” button, it will show that the verification is successful.
2. Create pixels. There are two types of pixels: one is BM pixels and the other is account pixels. Each has its own pros and cons. Choose a pixel according to your own preferences and habits.
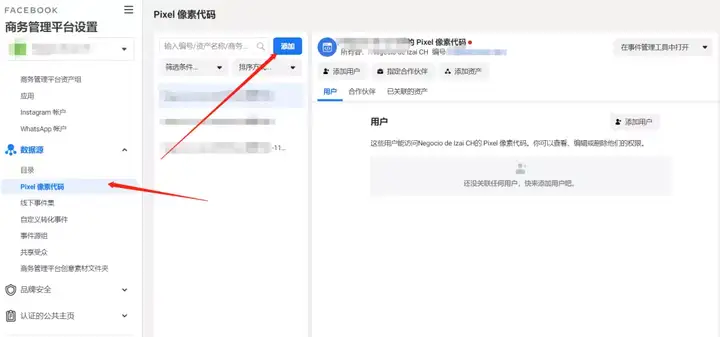
- Create BM pixels: Enter the business management platform settings, click Data Source—Pixel Code—Add.
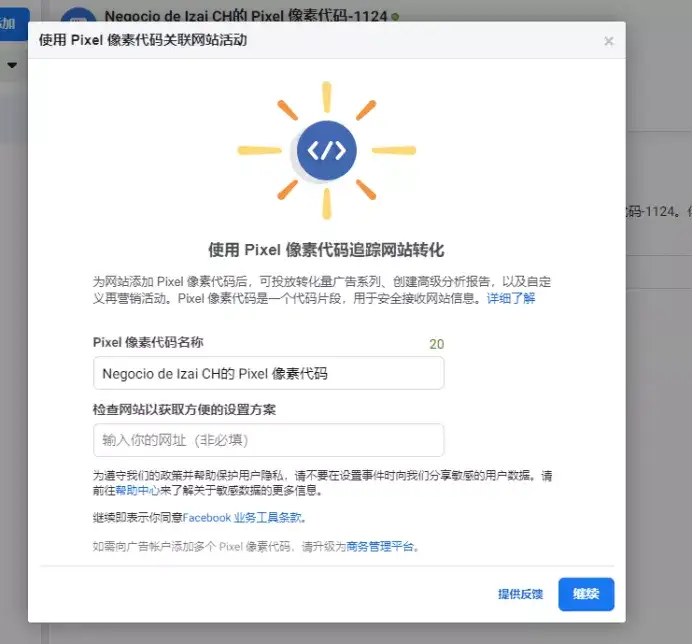
- Enter the name and domain name of the pixel and click Continue.
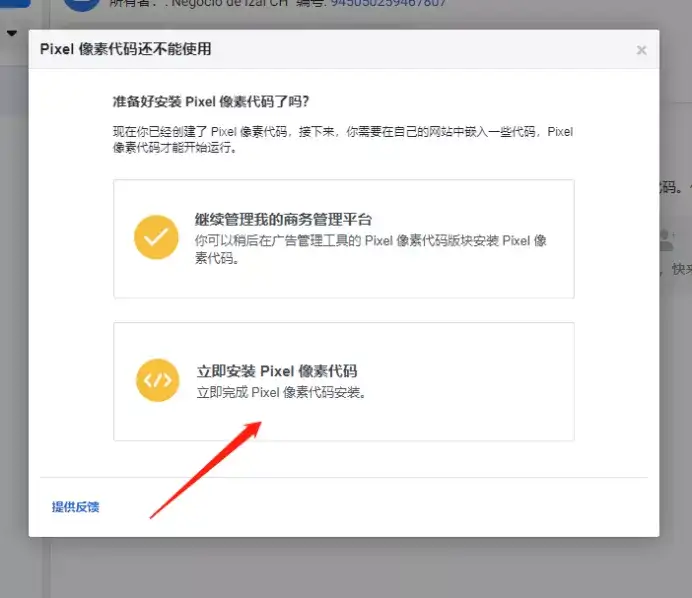
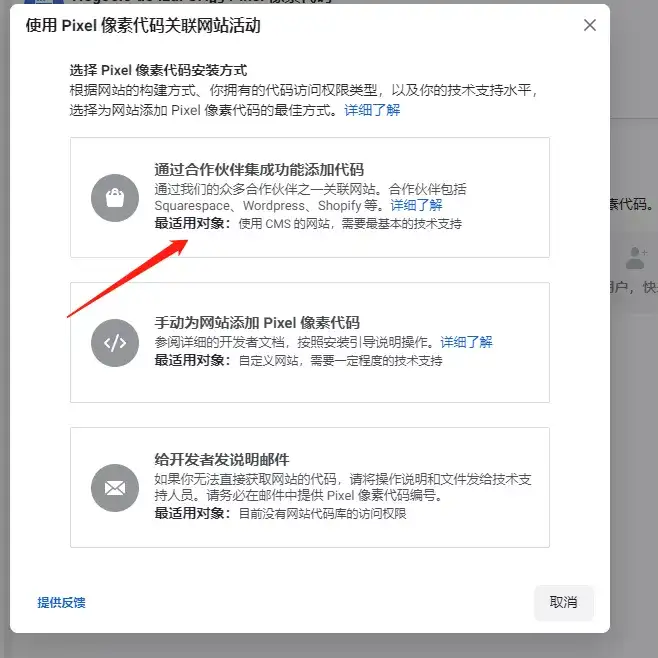
- Select Shopify options:
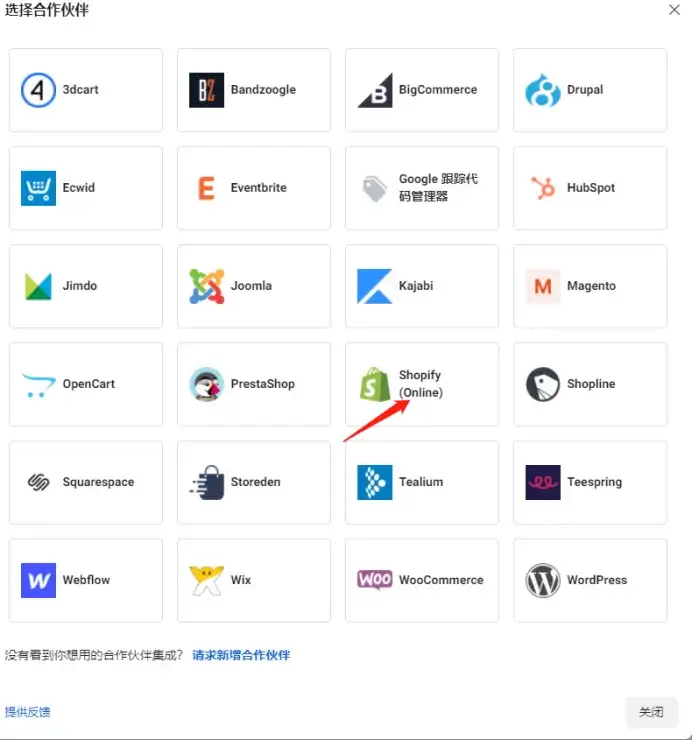
- Then the following pop-up window appears. The pixel is equivalent to being completely created, and then the pixel is tied to the shopify backend (the number in the red box is the pixel).
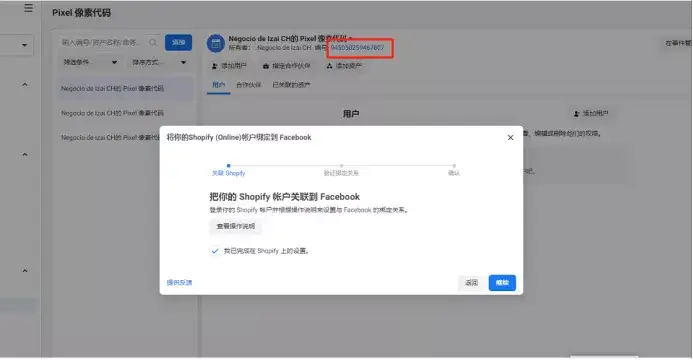
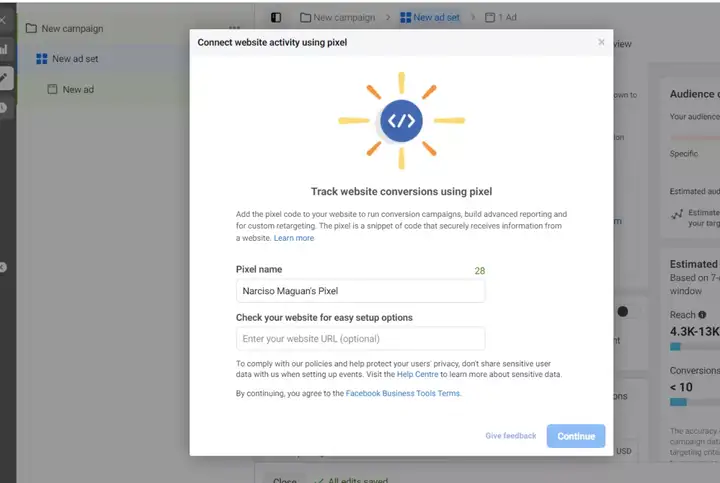
- Create a personal pixel, that is, a pixel at the ad account level. When placing ads, manually create a pixel. At the "Ad Group" level, you will see "Create Pixel Code", click to enter.
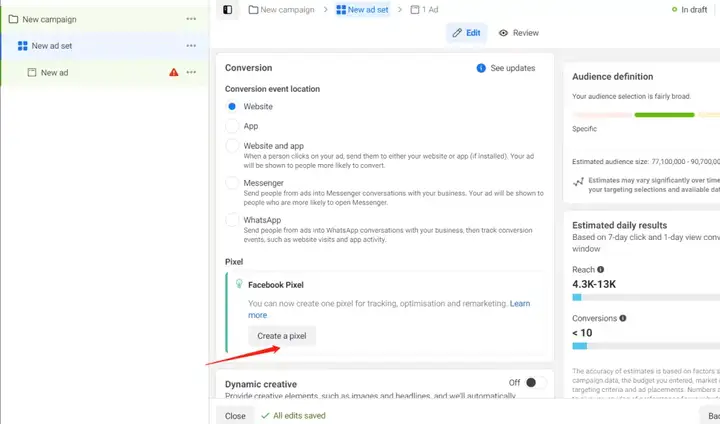
- Write the name of the pixel and the domain name of the company, then click Create, and the personal pixel will be created.
3. Configure events (this step can be omitted). Under normal circumstances, it can be delivered if there is domain verification and pixels. However, if the event matches the pixel, YYDS

. Data capture is more efficient and accurate.
- Configure the priority of events: Shopping - Add payment information - Initiate checkout - Add to cart - View.
- Here are the steps:
- Click event management tool;
- Click the pixel you want to use;
- Click the full event measurement option below the overview chart;
- Click to configure website events;
- Find the domain for which you want to configure events;
- Click to edit event;
- After adding, click Apply to save successfully.
Note: You can submit changes to the site event configuration once every 72 hours. Once a change to the site event configuration is confirmed, the ad group will immediately begin optimizing for the new event configuration.
Once the above is completed, you can place it safely and boldly. I wish you all great success.
02 Individual households put in SOP
It is so easy for individual users to place compared to enterprise users. There is no need to make preliminary preparations for delivery, such as domain verification, configuring events, etc. What's more, there is no need to purchase BM (you must know that using a domain verification and pixel-accepting BM is valuable)
), as long as you have a personal account and personal pixel, you can place it. It sounds like it saves a lot of money, but it is easy for individual households to die quickly, which is even more tiring. There is even a certain spending limit.
The following are the steps:
1. Prepare personal number, prepare an account that has more unlocking times, which is relatively more stable.
2. Create pixels, it can only be an account pixel under a personal account. The method of creating a pixel is exactly the same as the method of creating a personal pixel, for reference. The next step is to select the materials yourself, test the audience, and then launch (directly enter the advertising account from the personal account) and optimize. I wish everyone a successful single.
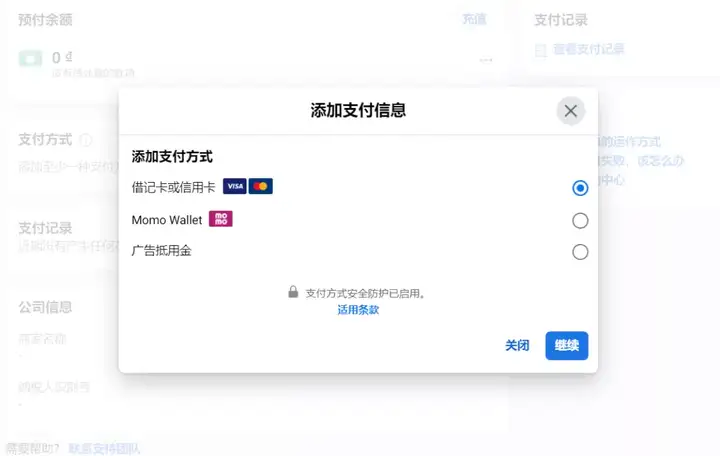
3. Tutorial on payment methods and card binding for personal account placement:
- Enter the personal account, click on All Tools - click on Bills.
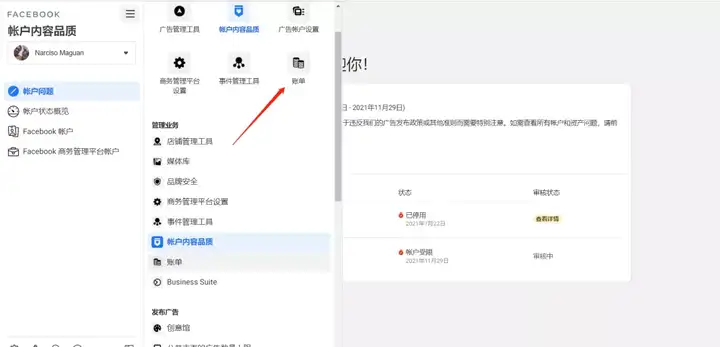
- Select payment settings.
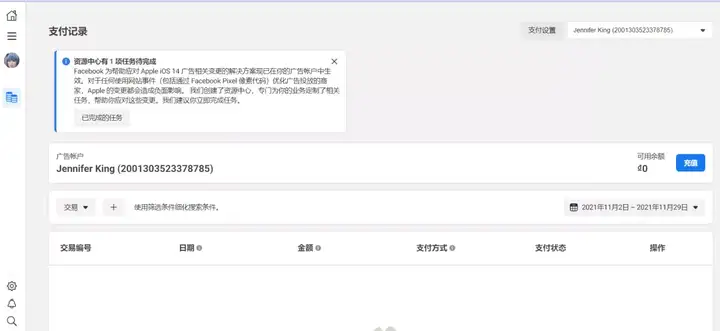
- Add payment method
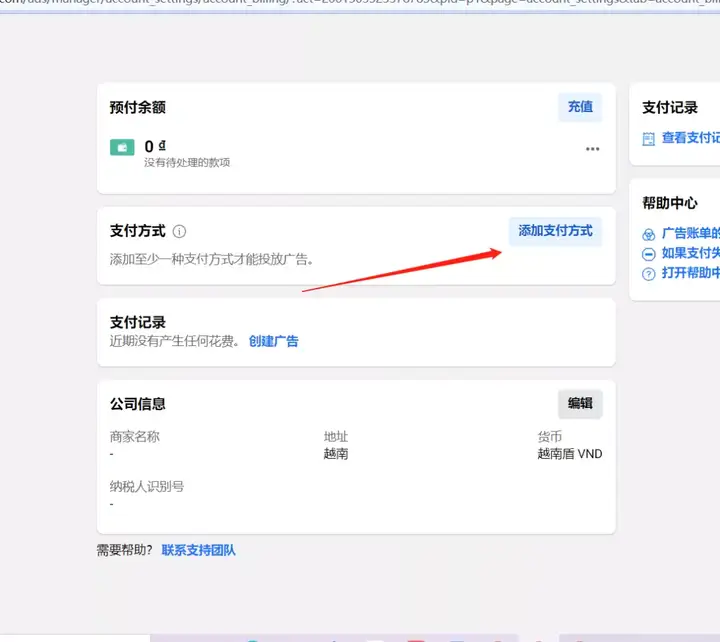
- Select the payment method you want to use, fill in the form according to the prompts, confirm and save, and it's OK.
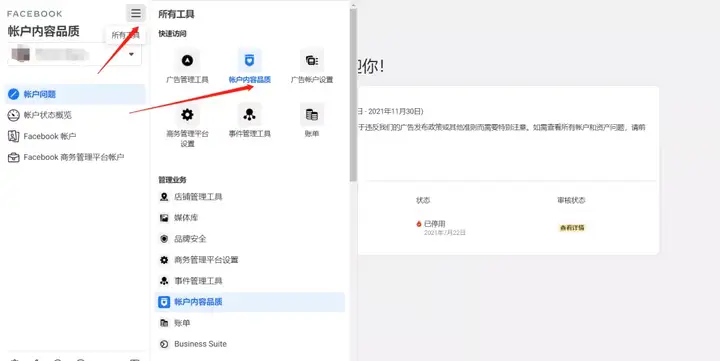
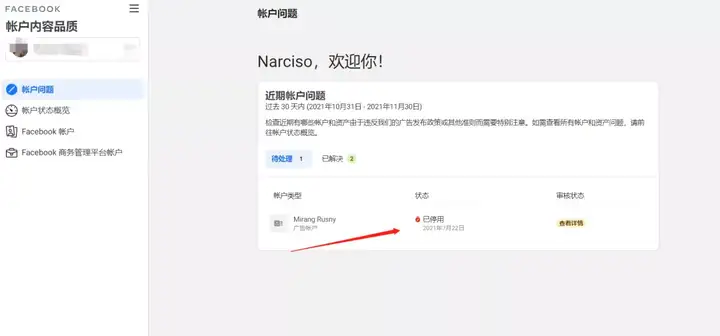
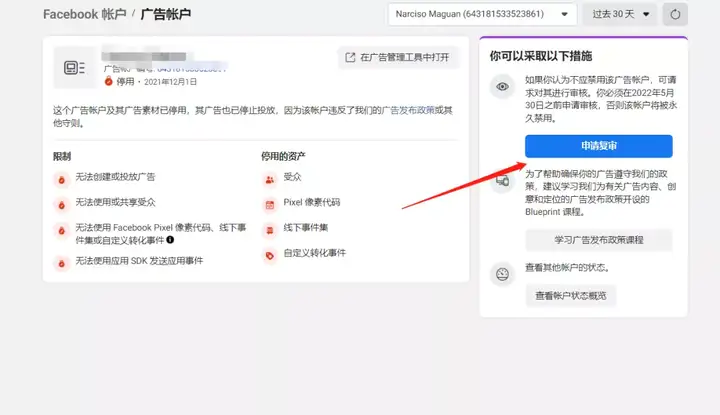
FB's individual accounts often hang up when advertising. The main phenomenon is account deactivation. Most accounts can be applied for back if there are no violations of advertising policies (such as infringing products, violent infringement products, etc.) and the materials are OK.
- Click All Tools - Click Account Content Quality, and you will see whether your personal account and personal account are normal.
- Click on the deactivated account you want to request review for.
- Click in and you will see a "Apply for review” button and just sit back and wait for the account to return.
4. Create BM(Just in case, the fb account is registered, and the good BM cannot be used) Create a backup link for BM. To put it bluntly, as the first step after successfully entering the new BM, we should first recruit the administrator (mainly for the security and stability of the new BM). It is recommended to add a few more numbers to the BM account to be prepared.
- Click on Business Management Platform Settings - Click on Individual User - Click on Add.
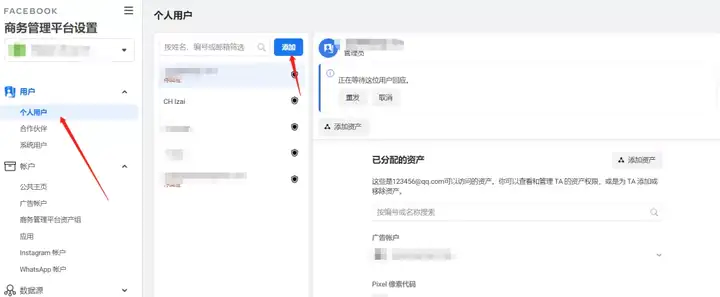
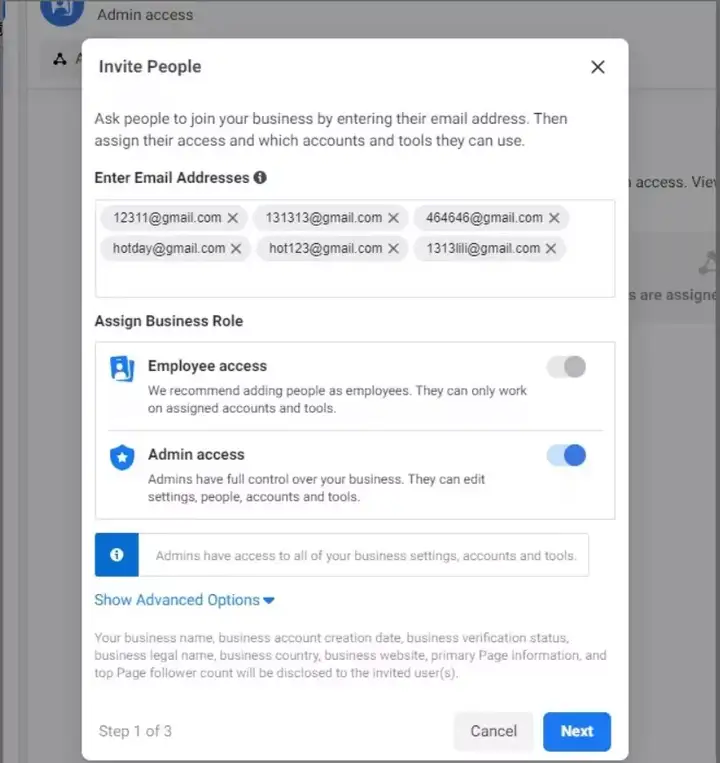
- Enter your email address, just write it as follows, and remember to select "Admin Access"Click "Next". (For minor questions about email settings, you can send a private message to the editor-in-chief WeChat at the bottom)
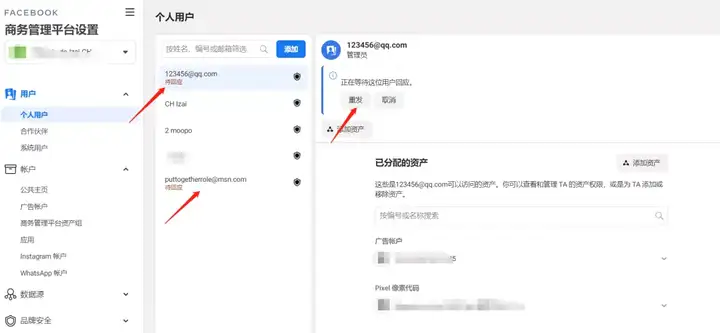
- It will then jump to a group of accounts with the note "Pending" below. Click on any one and select "Resend".
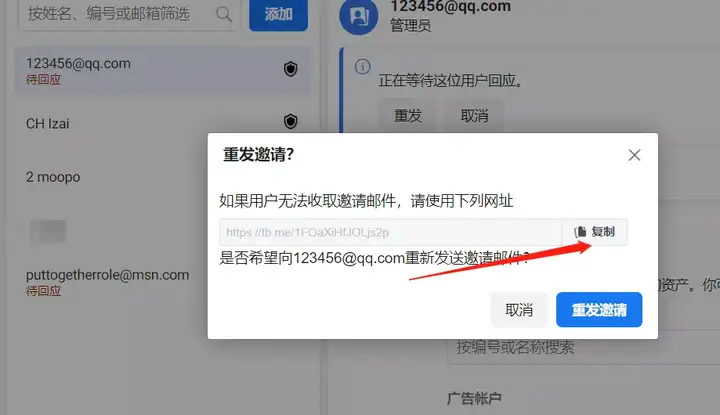
- A pop-up window will pop up, copy its link, open the browser where the prepared personal account is located, and then open it.
- The browser will pop up the following interface, enter a name, for example, the account number is 11, so the input here is 11 hao (remember in English, and there must be a space in the middle), click Next.
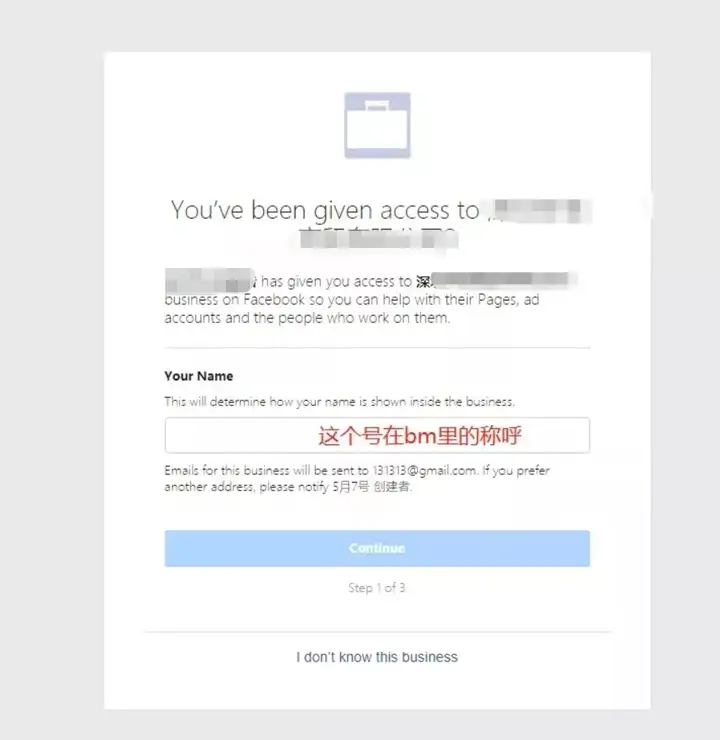
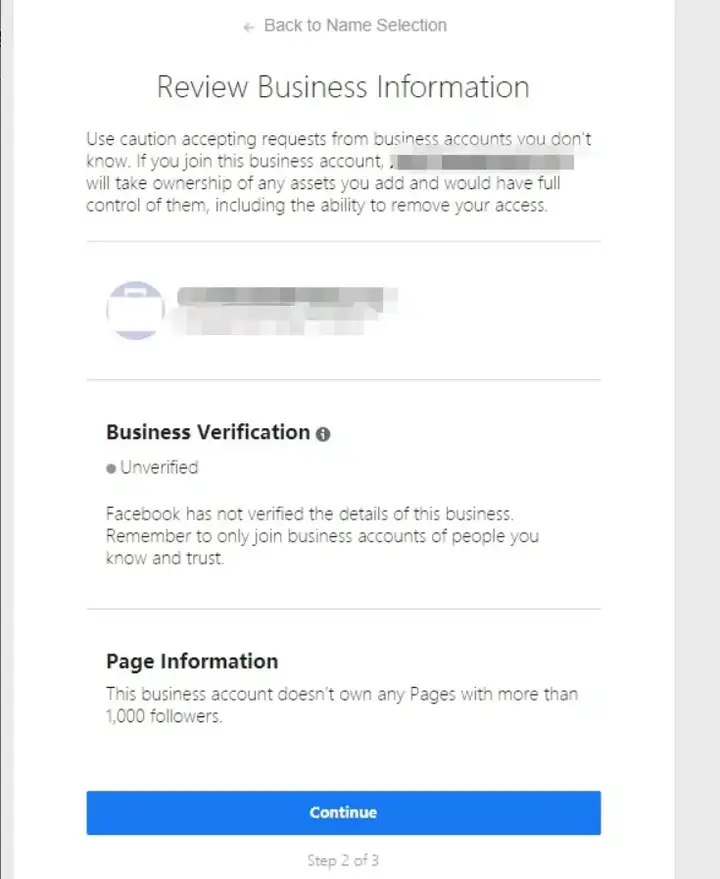
- Then click "Accept Invitation". If you have any questions about your email, you can directly chat privately with the editor-in-chief on WeChat below.
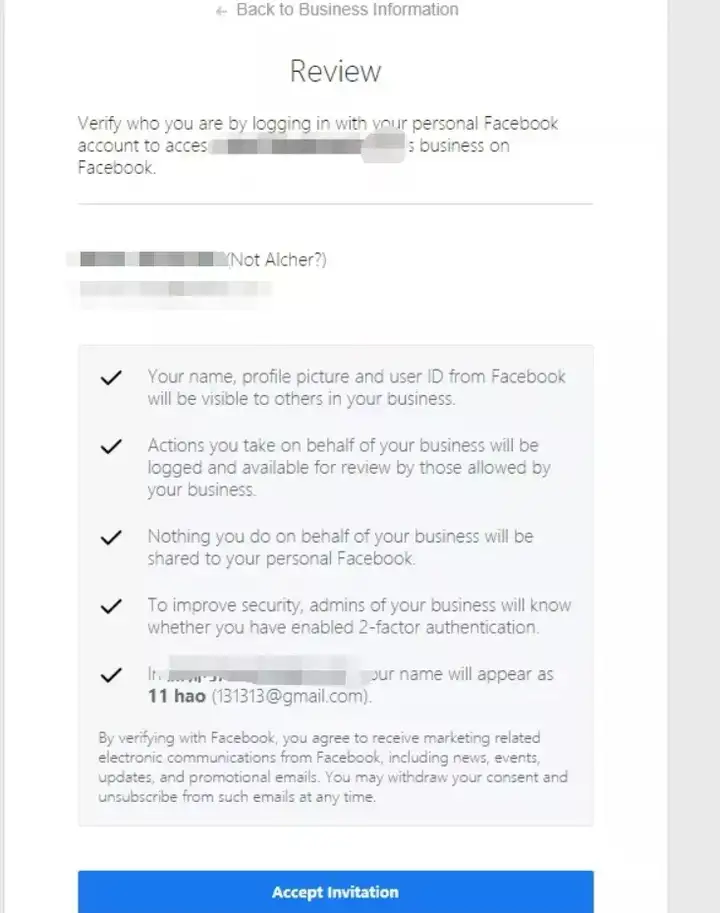
- Dang, Dang, Dang, you have successfully entered BM. Did you get it?